How to Organize your Drawers with Plastic Canvas DIY Baskets
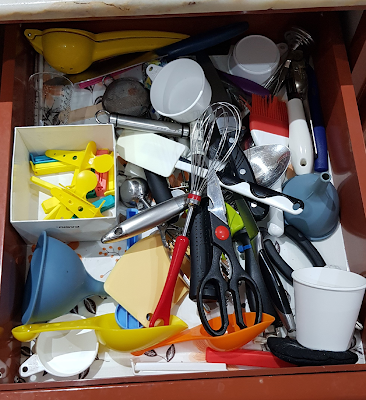
Don't you just hate it when you are rushing in kitchen and you cannot find the tool or spoon you are looking for in the drawers? You are fumbling and shuffling! You can find everything else except for what you need! How frustrating is that!
I will let you in on a Secret!(hush, hush) I am a big fan of storage solutions. I love to spend my time in de-cluttering, sorting and organizing stuff around the house. I try to work out systems for maximum storage and easy access.
I will let you in on a Secret!(hush, hush) I am a big fan of storage solutions. I love to spend my time in de-cluttering, sorting and organizing stuff around the house. I try to work out systems for maximum storage and easy access.
In my new kitchen, there were more drawers than before.
Obviously more things meant to be stuffed (wink, wink!) First, I sorted the
tools according to types/usage - Tools drawer, Cutlery, Cooking/Serving and
Roti-making. I first thought to buy drawer dividers but either they were
expensive or not according to my liking.
So, I decided to make those myself. But how? Cardboard was
first choice, I have experimented with it earlier, but they cannot be cleaned,
and stuff gets mixed up as it is not sturdy enough. Also, it wears off after
some time.
Instead of making dividers, Baskets were better
option. Working with fabric meant more work and accurate measurements. Also, it
will not stay up and it will collect dust and grains. I looked in my craft
stash and found Plastic Canvas Sheets. I have bought a dozen of these
for some project that I never started.
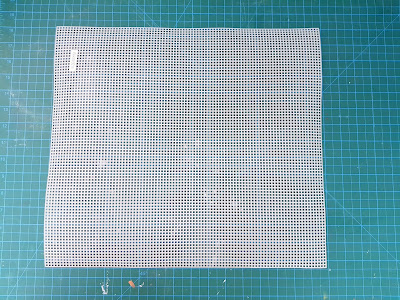
For those who do not know, these are sheets made of flexible
or hard plastic, according to type, and has square holes in it. These are
available in Pakistan in small rectangles around 4”. But here in Jeddah, KSA,
these sheets are larger in size about 16” x 14” approx. The holes are larger
too. Mainly these are used to make tissue boxes, trinket boxes and other
decorative things.
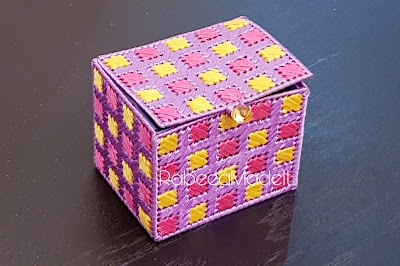
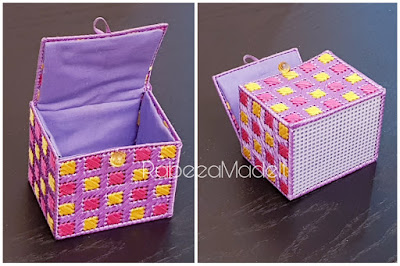
I have made one small box and embellished it with thin
ribbon. It was made years ago but still in good shape. Well we will discuss
embellishing on Plastic Canvas some other day.
Today I will show you how to make storage baskets with these
sheets. You can find these in Stationary shops in KSA and Craft shops in
Pakistan. I got them ridiculously cheap here, 1 dozen for Sr. 15 from Hindawiyah
Market. It may cost you more in other places.
 |
| Add caption |
The other thing you will need is Craft Wire. I used this
one, mainly we have used if for tying cords around the house. I like this one
as it is very thin but pliable and sturdy. It is covered with some shiny
plastic, so it is easy to work with too. I bought this roll from a stationary
shop for Sr. 8. I have used a lot of it but its no where to be near finish. So,
my total material cost for 4 drawers organizers is only Sr. 23. How cheap is
that?!
If it does not motivate you enough then I do not know
what will!
Other tools you will need are:
- Craft Scissors
- Pencil
- Ruler
- Pliers
- Paper Roll
Note: In this tutorial I will show you the basic concept
of making a basket with divider. From here on, you can use your own creativity
to make it however you need. I have also added 3 Mini Videos explaining the following methods. So follow the videos if you are having trouble understanding tutorial. :)
How to Measure your Drawer
First measure length and width of inside of your drawer and
draw it on paper with a ruler. Cut out the paper drawer template.
Place your tools on paper on how you want them sorted in
drawer.
Draw lines around them, its better if you keep the markings
in inches or cm, so they are easy to measure later.
A word of caution here: keep the overall measurement of
basket half inch or a cm less. Can you detect a wave in my basket? Its because
I made it according to full measurement, it took just a little bit more space
while making, hence making it bigger. Smaller can fit easily but bigger will
not. You will regret it later.
Take another measurement on how deep your drawer is. This
will determine how high your baskets are.
Now the Fun Part – Making the Baskets!
Let measure and cut plastic canvas sheets. Measure your
Plastic Canvas on paper templates, the cut accordingly. Do not forget side
pieces.
I will share lazygirl’s advise here, do not cut all the
pieces, these sheets can be folded. So, fold the side pieces from base piece.
Make sure you trim all the jagged edge of canvas, so it would
not poke you later.
Attaching Divider Piece
Cut a piece of wire double the length of edges attached.
Example, if three sides of divider pieces that will be
joined to base and side pieces is 12 inches, then wire should be 24 inches.
Place divider piece on base piece where it would be
attached. Pass wire through both pieces starting from center of canvas piece
and middle of wire.
Working from center to right side, leave one hole and pass
wire through next hole, front to back. Then pass to front leaving one hole.
Keep weaving the wire like that until you reach corner of divider piece.
Fold the base piece, so now you have side piece.
Straighten the divider piece, so its edge matches the side
piece. Pass wire from corner and side piece and continue weaving until you
reach the end of both pieces.
Pass wire twice through the last holes, fold it inside and
trim with pliers.
Now work center to right by rotating your piece first. Leave one hole, pass wire through next holes and
continue till end like you did with other side.
Here is a short video that I have made explaining the following method, if you are finding it difficult to understand.
Attaching side piece
Join all the pieces like that.
I made the complex sorting baskets a year ago. As drawer was
bigger than sheet so I joined a piece to base piece first. Then I joined the
smaller divider pieces, leaving wires hanging if I could not join all the sides
at that moment. Then larger divider pieces and side pieces at the end.
There you have it!
Your perfectly-fitting Organizing Custom made to your
Drawers and Stuff.
Each of my Kitchen Drawers is based on a system. Now I do
not have to think where to get what I need. I just open it and take it out and
put it back without any shuffling. It is easier to work when Everything in
its Place and there is a Place for Everything. It is one of my favorite
quotes. I store my things according to it.
I cannot wait to see what you guys make from this tutorial.
I got a lot of interest from people who wanted to learn how I made it.
Start Creating!


Very well explained and looks so easy to make considering all the details and measurements. Also the post keeps you engaged throughout the process to see the final product.
ReplyDeleteThank you dear. I am glad that I am able to explain to my readers, they are very supportive MashaAllah.
DeleteGreat work!!
ReplyDeleteThank you! :)
DeleteNice very useful thanks a million
ReplyDeleteHappy to be of help!
DeleteVery informative and organized way
ReplyDeleteThat was the idea! :)
DeleteJazakillah khair for such useful help.
ReplyDeletecan't wait to see what you make !
DeleteGr8 idea
ReplyDelete